
A practical, expert guide from The Mold Guys, Southwest Florida’s mold removal specialists
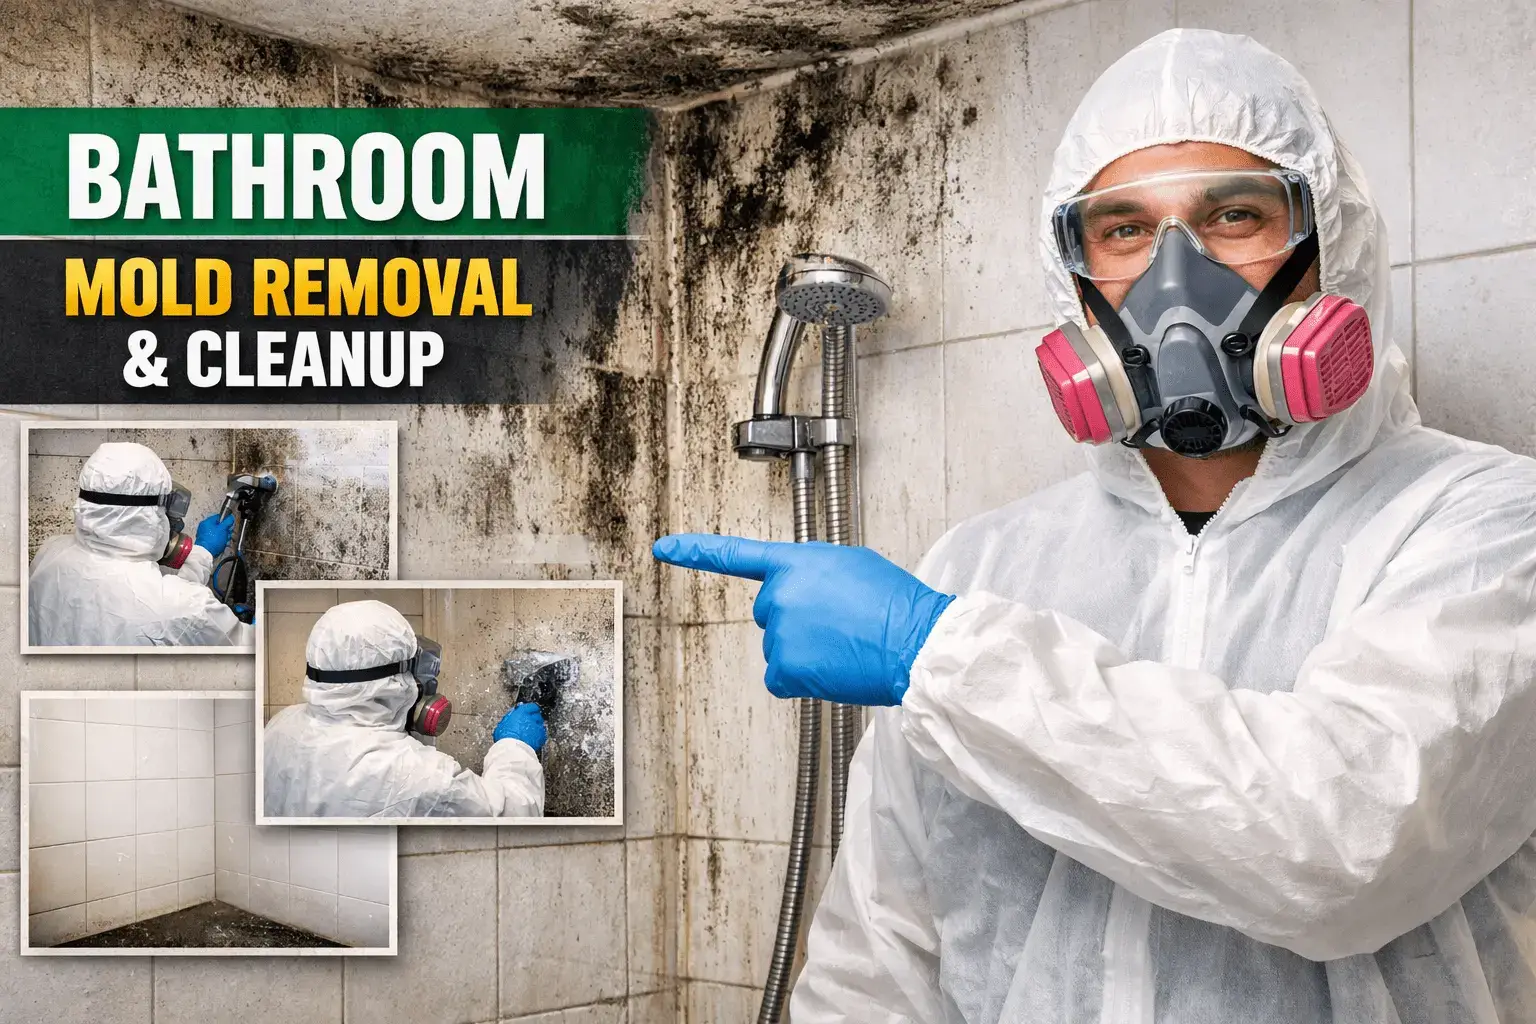
Dark spots in the grout, a musty smell that hits you when you turn on the water, slimy buildup creeping up the silicone. If that sounds like your shower, you are in good company. Showers are the single most common place mold shows up in a home, because they stay warm and wet for long stretches with very little airflow.
The good news: most shower mold is surface mold, and you can clean it yourself with a few household supplies and the right technique. The catch is that technique matters more than muscle, and a lot of the advice online either skips the steps that actually kill the mold or recommends products that make the problem worse. Below is what we use and recommend after treating mold in thousands of bathrooms, including which methods work on which surfaces, the advanced tricks for stubborn grout and caulk, and the honest line where a DIY clean stops being enough.
Quick answer: the fastest way to clean shower mold
Spray the moldy area with undiluted white vinegar or a 3% hydrogen peroxide solution until it is fully wet. Let it sit for 30 to 60 minutes so it can penetrate, then scrub firmly with a stiff bristled brush, rinse with warm water, and dry the surface completely. For black staining in grout, hydrogen peroxide works best.
Safety: never mix bleach with vinegar, ammonia, or hydrogen peroxide. The combination releases toxic gas in an enclosed bathroom.
Mold vs. Mildew: Know What You Are Dealing With
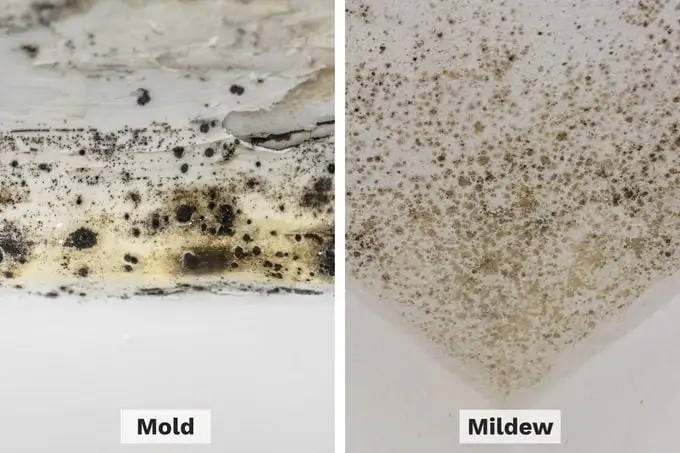
People use these words as if they mean the same thing, and for cleaning purposes the approach is similar, but knowing which one you have tells you how serious the problem is. Mildew is a surface fungus that stays flat and wipes away fairly easily. Mold grows deeper, can damage the surface it sits on, and is much harder to remove once it sets in.
|
|
Mildew |
Mold |
|
Color |
Gray or white, sometimes yellowing |
Black, green, brown, or even pink and orange |
|
Texture |
Flat, powdery, or fluffy |
Fuzzy, raised, or slimy to the touch |
|
Where it sits |
On top of the surface |
Grows into grout, caulk, drywall, and wood |
|
Smell |
Mild, musty |
Stronger, earthy, sometimes sharp |
|
Difficulty |
Wipes away with light cleaning |
Needs dwell time, scrubbing, sometimes replacement |
Why Shower Mold Keeps Coming Back
Mold needs three things to grow: moisture, a food source, and time. Your shower hands it all three after every use. If you clean the mold but the conditions that grew it are still there, it returns within days. These are the root causes we find behind almost every recurring case.
- Trapped humidity. Warm steam settles on cool tile and glass and does not dry before the next shower, especially in a bathroom without a working exhaust fan.
- Hidden plumbing leaks. A slow drip behind the wall or under the pan keeps the surrounding material wet around the clock, which is the perfect mold factory.
- Poor ventilation. A fan that is undersized for the room, or one that is never turned on, cannot clear the moist air fast enough.
- Cracked grout and failing caulk. Once the seal breaks, water gets behind the tile and into porous material where you cannot reach it.
- Soap and body oil residue. That thin film on your walls is literally food for mold. It feeds the colony and helps it spread.
Clean the mold, but treat the cause at the same time, or you will be back here next month.
Surface Mold vs. Embedded Mold: This Decides Your Whole Approach
This is the single most important distinction in this entire guide, and it is the one most articles skip. Whether you can fix the problem with a spray bottle or whether you need to remove and replace material comes down to how deep the mold has grown.
Surface mold (you can clean this yourself)
Surface mold sits on top of a nonporous or sealed surface: glazed tile, glass doors, fiberglass and acrylic surrounds, or the top layer of well sealed grout. It scrubs away, the area stays clean after you dry it, and it does not bleed back through within a few days. Every method in the next section handles this.
Embedded mold (this is where DIY usually fails)
Embedded mold has grown its roots, called hyphae, down into a porous material such as unsealed grout, silicone caulk, drywall, or the wood framing behind the wall. You can scrub the surface until the color is gone, but the colony underneath is still alive and the staining returns, often in the exact same spot, within a week. The tells are simple: black lines that come back fast after cleaning, caulk that stains again no matter what you do, soft or spongy drywall, and a musty smell that lingers even when nothing looks wet.
Field note from our crews
When we cut out a strip of moldy silicone caulk that a homeowner has cleaned ten times, the back of it is almost always solid black. The surface looked beatable. The mold was living in the material the whole time. That is the moment DIY ends and replacement or remediation begins.
Mold that keeps coming back is rarely just on the surface
If the black staining returns within days, sits behind the caulk, or comes with a musty smell you cannot place, the mold has grown into the material and surface cleaning will not hold. The Mold Guys find the moisture source, remove the mold safely, and make sure it does not come back. Serving all of Southwest Florida, open 24/7.
Get Professional Mold Removal or call us any time at (941) 416-4113
What You Will Need
You probably have most of this already. Gather everything before you start so you are not walking out of a wet shower mid clean.
- Rubber gloves and a fitted N95 mask, plus eye protection for overhead work
- Undiluted white vinegar and a bottle of 3% hydrogen peroxide
- Baking soda and, for stubborn jobs, borax
- A spray bottle, a stiff bristled brush, and an old toothbrush for grout lines and corners
- Microfiber cloths and a squeegee
- Good airflow: open a window, turn on the exhaust fan, and keep the door open
7 Field-Tested Methods to Clean Shower Mold
Start with the gentlest method that fits your surface and only move up if the mold resists. The order below runs from everyday cleaning to heavier treatment.
One safety rule before any method
Do not mix cleaning agents. Bleach plus vinegar makes chlorine gas. Bleach plus ammonia makes chloramine. Bleach plus hydrogen peroxide is also reactive. In a small bathroom these are genuinely dangerous. Use one agent, rinse, and ventilate before switching to another.
Method 1: White Vinegar, the Everyday Workhorse
Vinegar is acidic enough to kill the large majority of common household mold, and unlike bleach it penetrates porous surfaces to reach the roots. It is our default for routine cleaning and light patches.
- Fill a spray bottle with undiluted white vinegar. Do not water it down.
- Spray the moldy area until it is visibly wet, including grout lines and corners.
- Let it dwell 30 to 60 minutes. This is the step people rush, and it is the step that does the work.
- Scrub with a stiff brush, using the toothbrush for grout and edges.
- Rinse with warm water and dry completely with a microfiber cloth.
Best for: tile, glass, fiberglass, sealed grout, and routine weekly cleaning. Heads up: vinegar kills the mold but can leave behind gray or black staining in grout, which is where the next method comes in.
Method 2: 3% Hydrogen Peroxide for Stains and Grout
Hydrogen peroxide both kills mold and lifts the dark color it leaves in porous grout, so it is the one to reach for when vinegar cleaned the area but the lines still look gray. It is also a strong first choice for black mold on hard surfaces.
- Pour 3% hydrogen peroxide into a spray bottle straight from the brown bottle. Keep it out of light so it stays effective.
- Saturate the area and let it bubble and sit for 10 to 30 minutes.
- For grout, scrub along the lines with a toothbrush as it works.
- Rinse and dry. Repeat once on heavy staining.
Best for: black and gray staining, grout lines, and any nonporous surface. Advanced tip: for caulk and grout, lay peroxide soaked paper towels over the line and cover with plastic wrap so the solution stays wet against the surface for a few hours. This is the closest a homeowner gets to a professional poultice.
Method 3: Baking Soda Paste for Scrubbing Power and Odor
Baking soda is mildly abrasive, which makes it ideal for textured surfaces and stubborn spots, and it neutralizes the musty smell at the same time.
- Mix one part baking soda with enough water to make a thick paste.
- Spread it over the moldy area and into grout lines.
- Let it sit 10 to 15 minutes, then scrub firmly.
- Rinse and dry. For extra punch, spray vinegar over the paste before scrubbing (see Method 5).
Best for: textured floors, corners, stubborn buildup, and lingering odor.
Method 4: Borax Solution for Longer-Lasting Inhibition
Borax is the advanced step most homeowners have never tried. It kills mold like the others, but because you do not rinse it off, it leaves a residue that keeps inhibiting regrowth. It is a favorite for areas that keep coming back.
- Dissolve one cup of borax in one gallon of warm water.
- Apply generously to the moldy surface with a brush or spray bottle.
- Scrub the area to lift the mold.
- Wipe away the loosened mold but leave the borax solution on the surface to dry. Do not rinse.
Best for: recurring mold and high moisture zones. Note: keep borax away from pets and rinse any surfaces they contact.
Method 5: Vinegar Then Baking Soda, Sequenced the Right Way
Combining these two is genuinely effective, but only if you do it in sequence rather than mixing them in a bottle. Mixed together in a container they neutralize each other and fizz into mostly water. Layered on the surface, the reaction lifts grime.
- Spread baking soda paste on the mold and let it sit 10 minutes.
- Spray white vinegar over the paste. It will fizz.
- Scrub while it reacts, then rinse and dry.
Best for: heavy buildup on grout and corners where one agent alone is not enough.
Method 6: Commercial Mold Removers, and When to Reach for Them
Store bought removers are convenient and effective for surface mold, and the better ones combine a mold killing agent with surfactants that cut through soap scum. Look for an EPA registration number on the label, which means the product is verified to do what it claims. They are worth using when you want speed and do not want to mix anything yourself.
Best for: fast surface cleaning on tile, glass, and fiberglass. We cover specific product types further down, with what to look for on the label.
Method 7: Why We Do Not Recommend Bleach on Porous Surfaces
This is where our advice differs from a lot of what you will read, and it is based on how mold actually behaves. Bleach removes the color of mold, so a bleached surface looks clean. On glass, sealed tile, and fiberglass that is fine. The problem is porous material like grout, caulk, and drywall. Bleach is mostly water, and that water soaks into the porous surface and feeds the roots, while the chlorine evaporates off the top. You get a surface that looks clean for a week and then the mold comes back, sometimes worse than before.
For porous surfaces, vinegar, hydrogen peroxide, and borax are the better tools because they penetrate and kill rather than just bleaching the surface. Save bleach for nonporous surfaces where appearance is the goal, use it diluted at one cup per gallon of water, and never combine it with anything else.
Quick comparison of every method
|
Method |
Best surface |
Dwell time |
Reaches roots |
Rinse off |
|
White vinegar |
Tile, glass, sealed grout |
30 to 60 min |
Yes |
Yes |
|
Hydrogen peroxide 3% |
Grout, stains, hard surfaces |
10 to 30 min |
Yes |
Yes |
|
Baking soda paste |
Textured, corners, odor |
10 to 15 min |
Surface |
Yes |
|
Borax solution |
Recurring, high moisture |
Leave on |
Yes |
No |
|
Vinegar + baking soda |
Heavy grout buildup |
10 min |
Yes |
Yes |
|
Commercial remover |
Fast surface cleaning |
As Per label |
Varies |
As Per label |
|
Bleach (diluted) |
Nonporous only |
10 min |
No |
Yes |
How to Clean Mold From Specific Shower Surfaces
The right method shifts depending on what you are cleaning. Here is how to handle each surface in a typical shower.
Grout
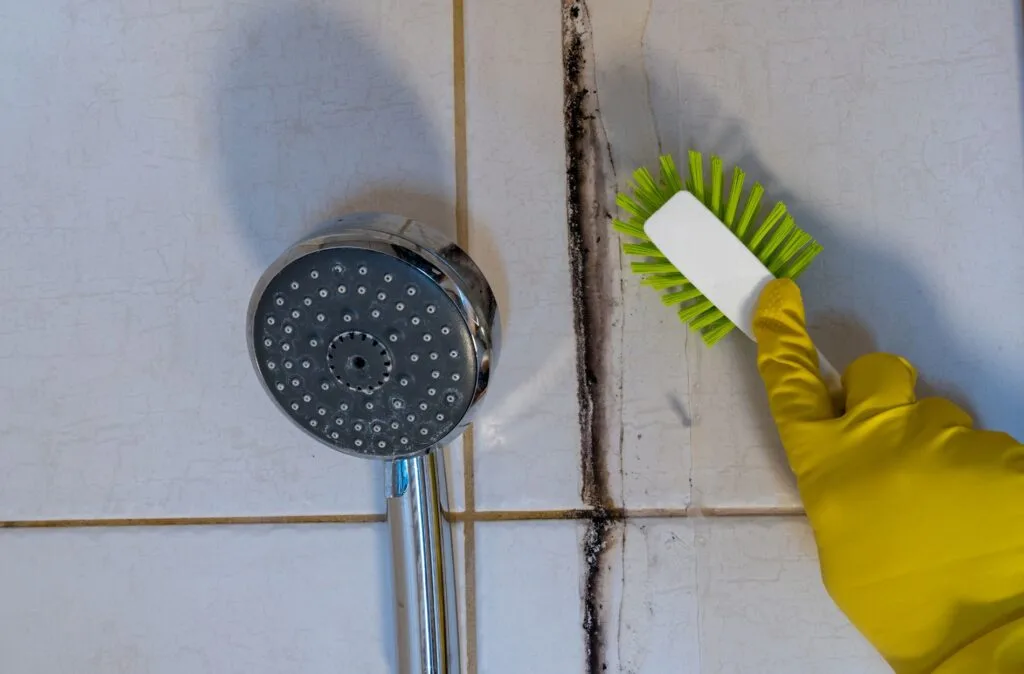
Grout is porous, so it traps mold inside the line. Spray with hydrogen peroxide, let it dwell, then scrub along the line with a stiff toothbrush. Once the grout is clean and fully dry, apply a penetrating grout sealer. Sealed grout resists moisture and is far easier to keep clean.
Silicone Caulk and Sealant
Caulk is the hardest surface to win because mold roots into the silicone itself. Try the peroxide poultice first: soaked paper towels under plastic wrap for several hours. If the staining survives that, the mold is embedded and the only durable fix is to cut out the old caulk and apply fresh mold resistant silicone. There is no spray that revives caulk the mold has grown into.
Glass Doors and Tracks
Glass is nonporous, so almost anything works. Vinegar handles the door and the soap scum at once. The sliding track is the real hideout: spray it, let it sit, then run a vinegar soaked cloth through the channel and use a toothbrush in the corners.
Fiberglass and Acrylic Surrounds
Use vinegar or a baking soda paste and a soft brush. Skip anything heavily abrasive, which can scratch and dull these surfaces and create new texture for mold to grab onto.
Shower Curtains and Liners
Fabric curtains can go in the washing machine with a cup of vinegar added to the cycle. Plastic liners can be wiped with vinegar, but if the mold has set into the seams, replacing a liner costs a few dollars and saves the effort.
Shower Ceiling
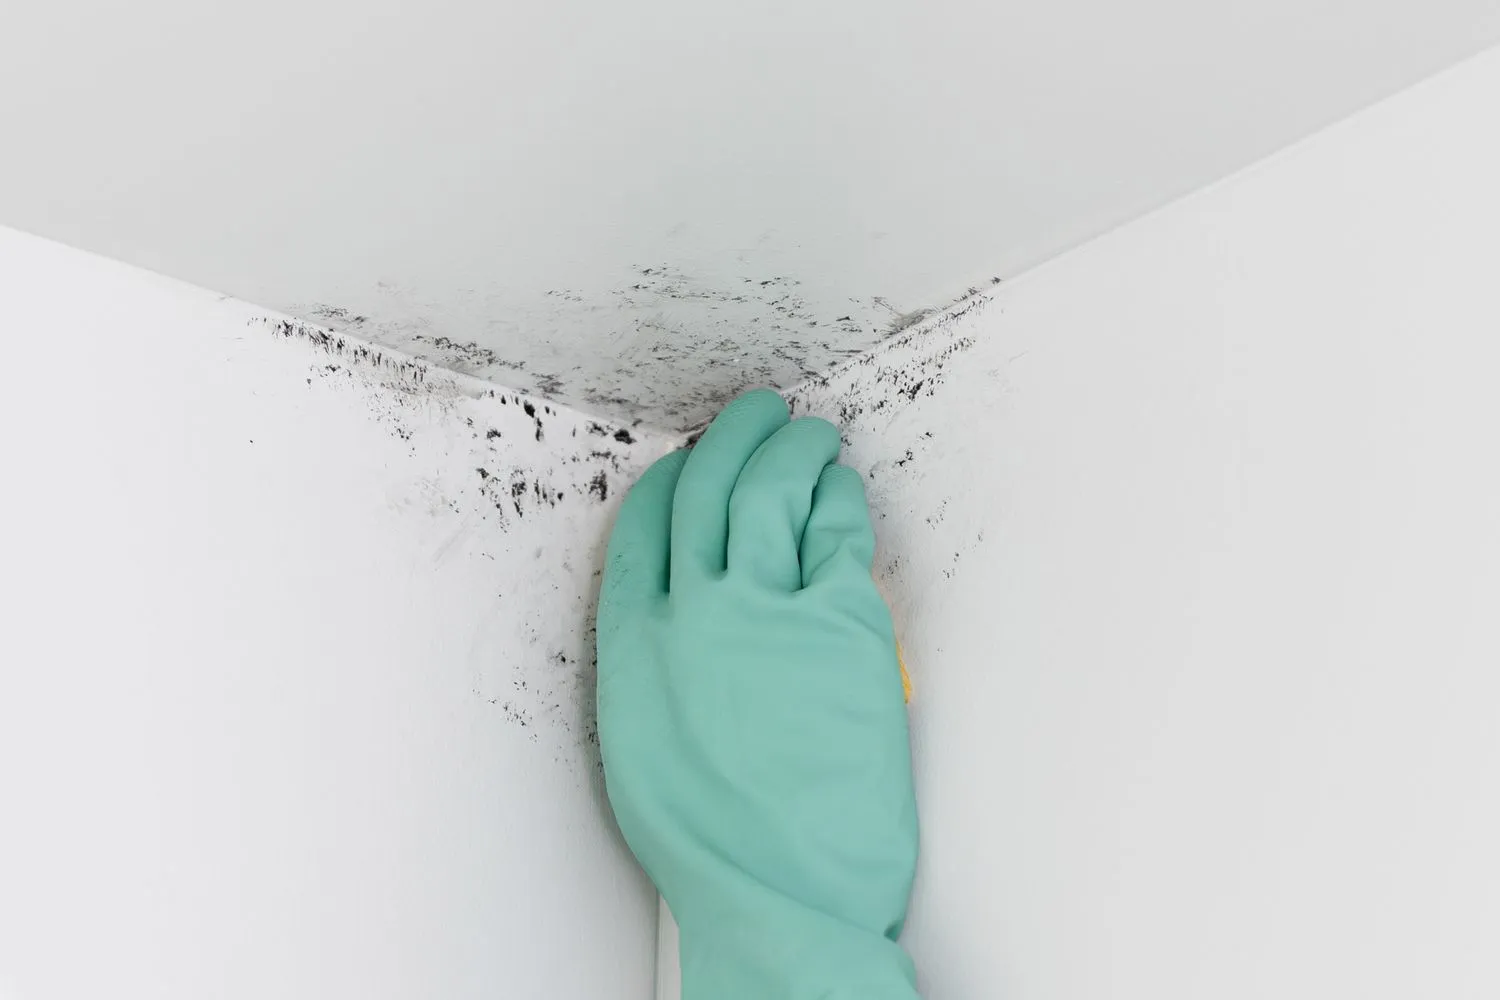
Wear eye protection, since you are spraying overhead. Apply vinegar or peroxide with a sponge mop on an extension pole rather than balancing on a ladder in a wet space. Ceiling mold is a ventilation flag more than anything, so improving the exhaust fan matters as much as the cleaning.
Black Mold in the Shower: Is It Dangerous, and When to Call a Pro
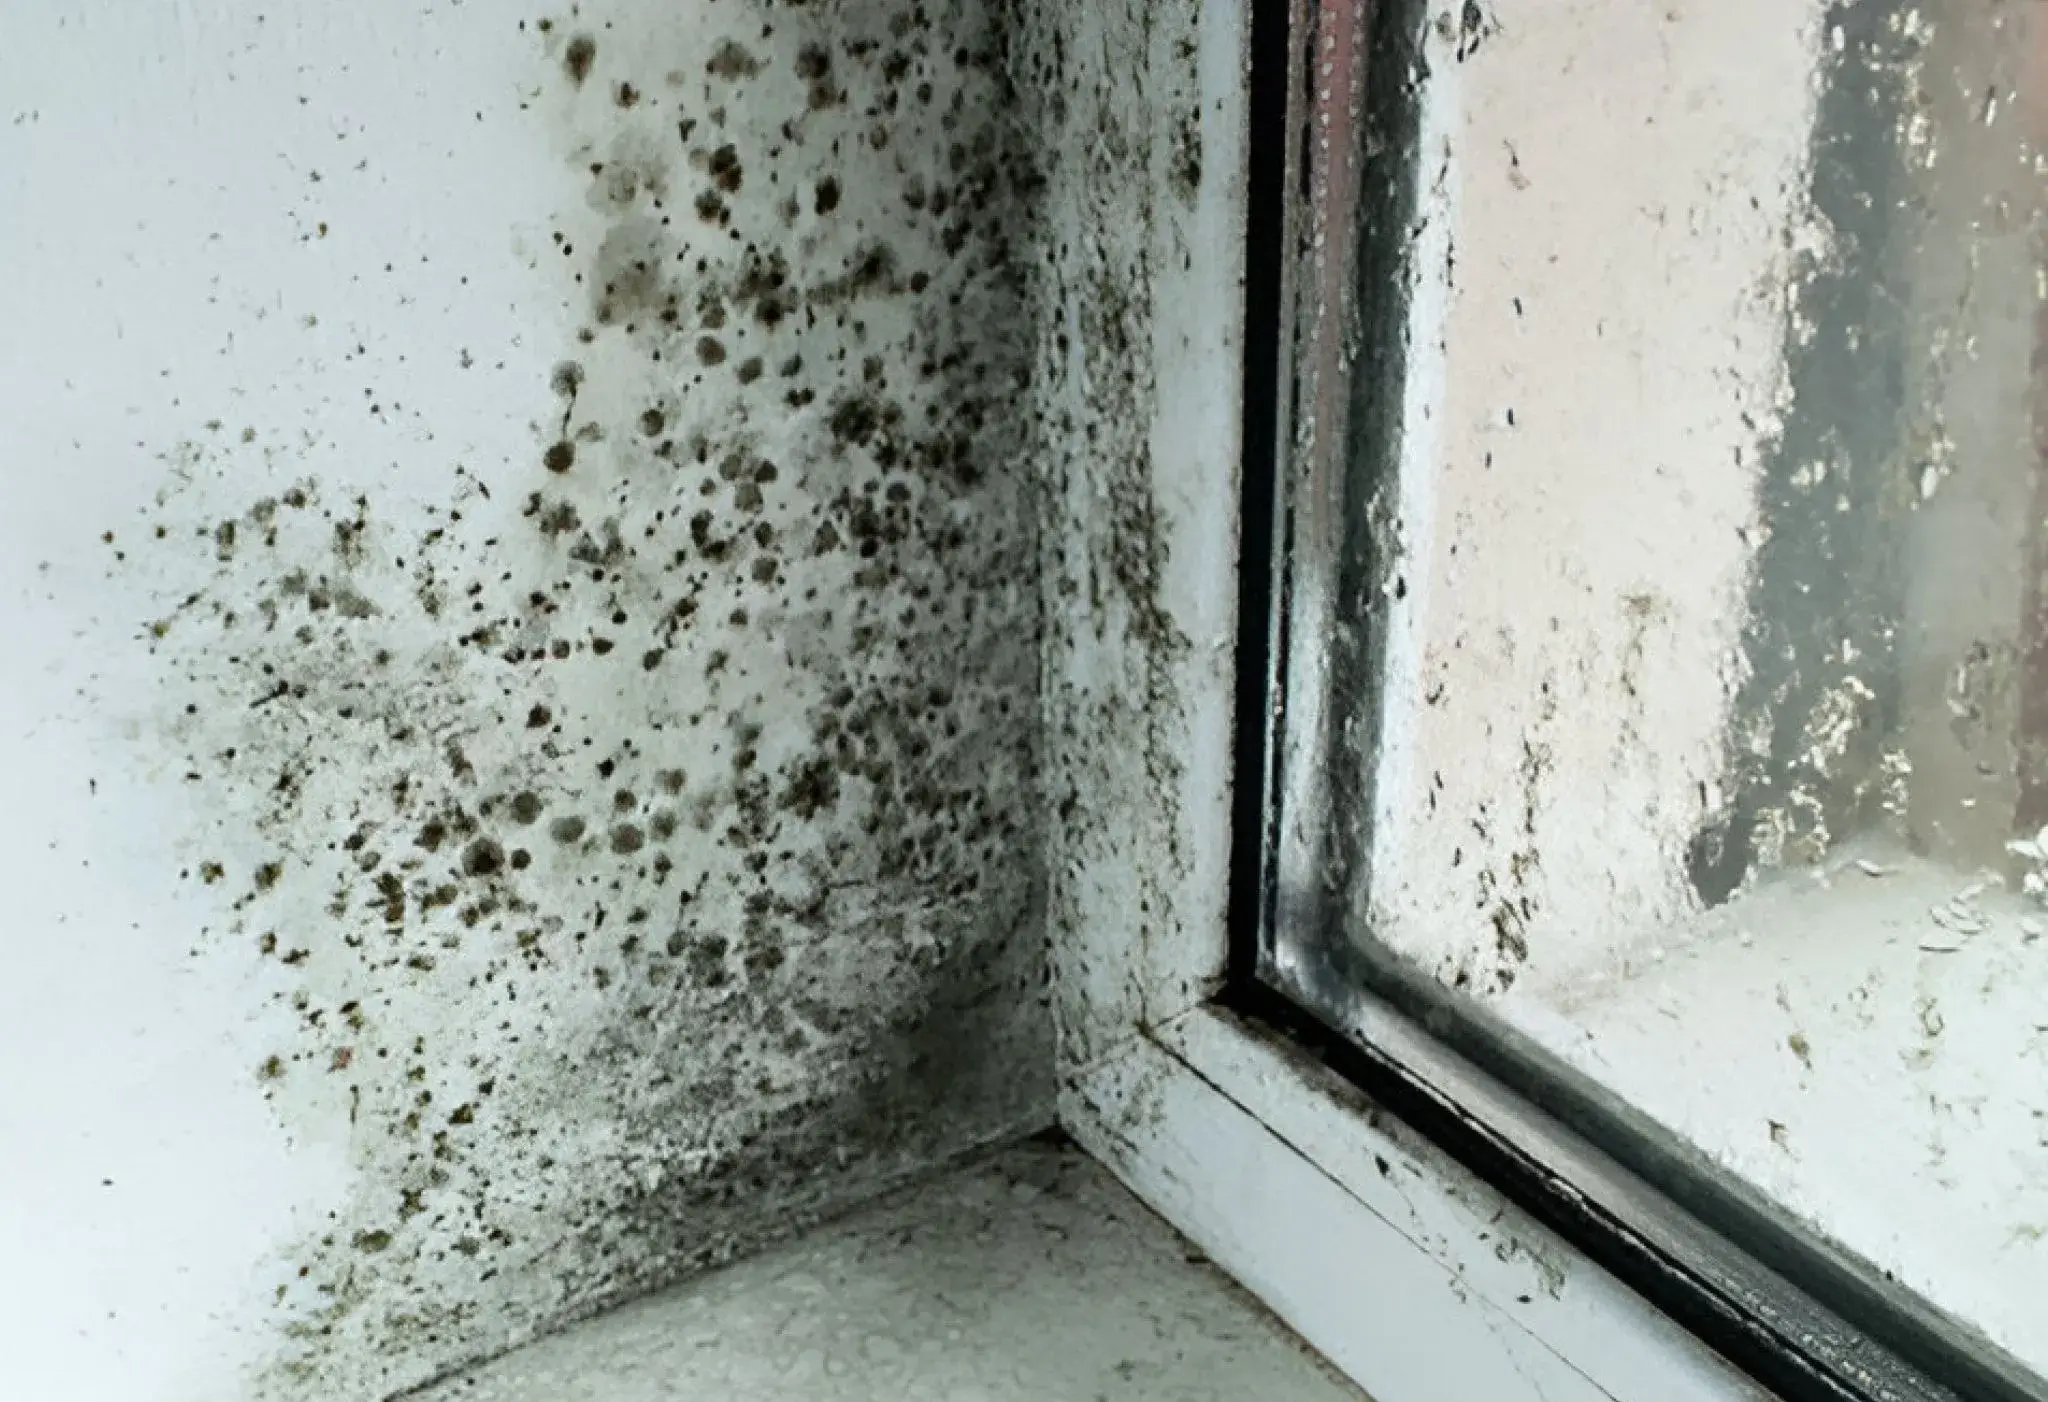
Black mold is the phrase that worries people most, so it is worth being straight about it. Most of the black or dark green mold in showers is common species such as Cladosporium or Aspergillus. For a healthy person these are irritants. They can cause sneezing, congestion, coughing, watery eyes, and throat irritation, and they hit people with asthma, allergies, or weakened immune systems harder.
The mold that gets the scary headlines, Stachybotrys chartarum, needs constant water saturation and a cellulose food source like drywall to grow, which is why it shows up more often behind a wall or on soaked drywall than on hard shower tile. You cannot identify the species by color alone, and the practical takeaway is the same either way: remove it promptly, find the moisture feeding it, and do not let a small patch become a wall sized one.
Call a professional if any of these are true:
- The mold covers more than about ten square feet (roughly a three foot by three foot patch).
- It keeps coming back in the same spot after you have cleaned it properly.
- There is a known leak, past flooding, or visible water damage nearby.
- You smell a persistent musty odor but cannot see the source, which suggests hidden growth.
- Anyone in the home has asthma, a respiratory condition, or a compromised immune system.
Not sure if it is just surface mold or something deeper?
Black mold that spreads, returns, or comes with a musty smell behind the wall needs more than a cleaner. The Mold Guys provide professional inspection, testing, and complete mold removal so you know the problem is actually gone, not just hidden. Get a clear assessment from a team that does this every day across Southwest Florida.
Schedule a Mold Inspection or call us any time at (941) 416-4113
Best Mold Removers for the Shower in 2026
If you would rather buy a ready made solution than mix your own, here is how the main categories compare and what to look for on the label. The right pick depends on your surface and how heavy the mold is.
|
Product type |
Best for |
What to know |
|
Spray mold and mildew removers |
Quick surface cleaning on tile and glass |
Convenient and fast; look for an EPA registration number |
|
Oxygen and peroxide based cleaners |
Grout and color staining |
Safer in enclosed spaces; lifts stains without harsh fumes |
|
Gel or cling removers |
Vertical surfaces and grout lines |
Stays put so it can dwell on walls and caulk |
|
Bleach based bathroom cleaners |
Nonporous surfaces, appearance only |
Removes color but not roots in porous material; never mix |
|
Grout sealers (prevention) |
After cleaning, to stop regrowth |
Apply to dry grout; the most overlooked product on this list |
What to look for: an EPA registration number means the product is verified to kill what it claims. A combination of a mold killing agent plus a surfactant cleans soap scum at the same time. For porous surfaces, choose a penetrating formula over a bleach based one. And do not skip a grout sealer, since preventing regrowth saves you the cleaning entirely.
How to Stop Shower Mold From Coming Back
Cleaning is the cure. Moisture control is the prevention, and it does far more long term work. Take moisture out of the equation and mold simply cannot establish. These are the habits and fixes that keep it gone.
Keep humidity under 50 percent
Mold struggles to grow below 50 percent relative humidity. A small bathroom hygrometer costs a few dollars and tells you exactly where you stand. If you sit above 50 percent after showers, your ventilation or your habits need attention.
Run the right size exhaust fan, long enough
As a rule of thumb, your fan should move at least one CFM per square foot of bathroom, so a 50 square foot bathroom needs a fan rated around 50 CFM, and a little more if you have a separate enclosed shower or jetted tub. Just as important, run it during the shower and for 20 to 30 minutes after, since most of the moisture clears in that window. A timer switch makes this automatic.
Squeegee in 30 seconds
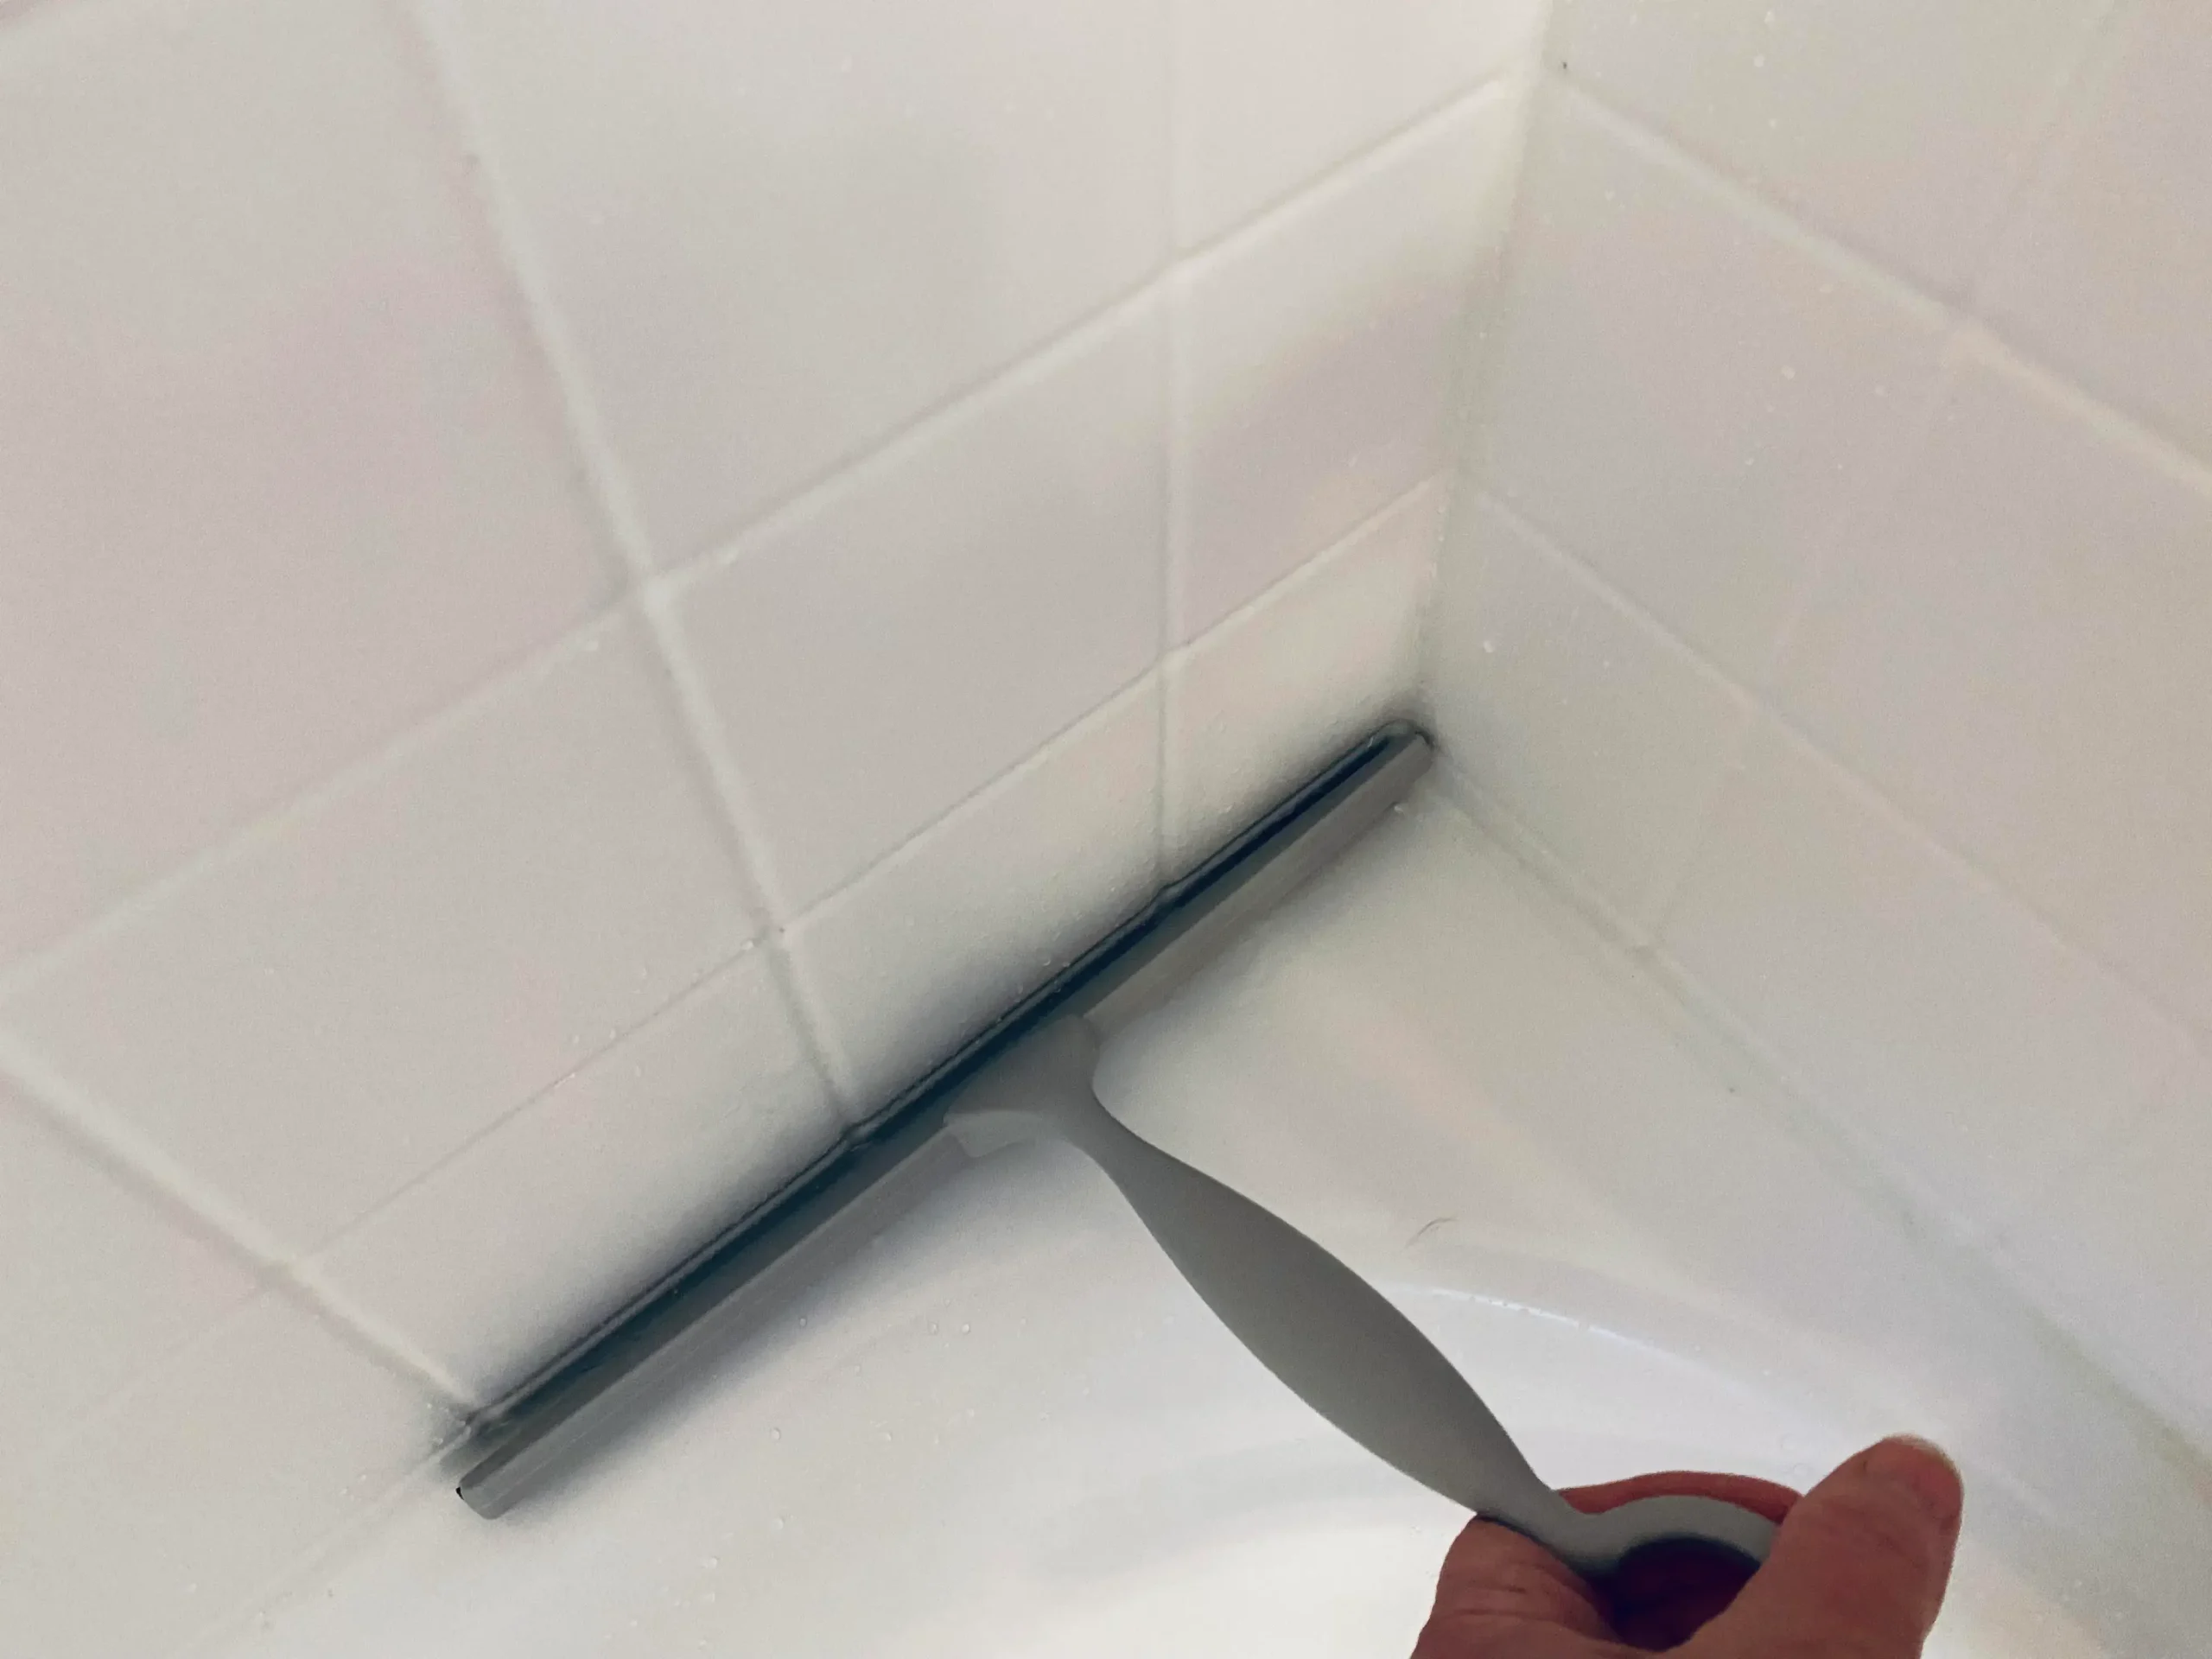
This is the highest return habit there is. A quick pass with a squeegee on the walls and glass after each shower removes the standing water mold needs. Thirty seconds prevents more mold than any deep clean.
Fix leaks fast and seal your grout
A slow leak feeds mold around the clock, so treat any drip as urgent. After cleaning, seal porous grout with a penetrating sealer and refresh it about once a year. Sealed grout sheds water instead of soaking it up.
Help the air move and choose smart materials
Leave the door or curtain open after showering so the space can dry, and skip cloth bath mats and any wallpaper in the bathroom, both of which trap moisture. A dehumidifier helps in humid climates, which is exactly why this matters so much here in Florida.
When DIY Is Not Enough: What Professional Removal Actually Does
There is no shame in calling for help, and for the cases below it is the smart financial move, because cleaning the same spot forever or letting hidden mold damage the structure costs far more than handling it right once. A professional team does several things a homeowner cannot.
- Finds the moisture source. Using moisture meters and thermal imaging to locate the leak or condensation feeding the mold, including behind walls.
- Contains the area. Sealing off the space and using HEPA air filtration so spores do not spread to the rest of the home during removal.
- Removes mold at the source. Taking out and replacing affected porous materials rather than just cleaning the visible surface.
- Treats and prevents. Applying commercial grade antimicrobial treatment and advising on the repairs that stop it returning.
- Confirms it is gone. Post remediation verification so you know the problem is actually resolved, not just out of sight.
Frequently Asked Questions
Q: What kills mold in the shower fast?
A: A 3% hydrogen peroxide solution or undiluted white vinegar kills most shower mold when you let it sit on the surface for 30 to 60 minutes before scrubbing. Peroxide works a little faster on the gray and black staining that vinegar can leave behind. Whichever you use, the dwell time matters more than how hard you scrub. Rinse with warm water and dry the surface completely so it does not come right back.
Q: How do you get rid of black mold in the shower?
A: For black mold on hard, sealed surfaces like tile and glass, saturate the area with hydrogen peroxide or vinegar, wait an hour, then scrub with a stiff brush and rinse. If the black staining sits inside the grout lines or behind the caulk and returns within days, the mold has grown into the porous material and surface cleaning will not hold. That situation usually needs the caulk replaced or a professional assessment, especially if the patch is larger than about ten square feet.
Q: What kills 100 percent of mold?
A: No single household product guarantees total removal, because mold is a living organism with roots that work into porous surfaces. Hydrogen peroxide, vinegar, borax, and EPA registered mold removers kill the mold they reach on hard surfaces. The only way to truly stop it for good is to remove the mold and then fix the moisture source that is feeding it. That is why prevention does more long term work than any cleaner.
Q: Is bleach or vinegar better for shower mold?
A: Vinegar is the better all around choice. Bleach can erase the color of mold on nonporous surfaces, which makes the area look clean, but it does not penetrate porous grout, caulk, or drywall to kill the roots, and the water in bleach can actually feed regrowth in those materials. Vinegar penetrates better and is safer to use in a small, enclosed bathroom. Never mix the two.
Q: Why does mold keep coming back in my shower?
A: Recurring mold almost always means one of two things. Either the moisture is never fully clearing because the bathroom is under ventilated, or the mold has grown into a porous surface such as grout or caulk and you are only cleaning the part you can see. Fix the airflow, keep humidity under 50 percent, and replace any caulk that stains again within a week of cleaning.
Q: How do I remove mold from shower caulk and silicone?
A: Lay a strip of paper towel soaked in hydrogen peroxide along the caulk line, cover it with plastic wrap to hold the moisture, and leave it for several hours. If the caulk comes back clean, reseal as needed. If the black staining is still embedded after treatment, the mold is inside the silicone and the only real fix is to cut it out and apply fresh mold resistant caulk.
Q: Is shower mold dangerous to my health?
A: For most healthy people, common shower mold is an irritant rather than a serious danger. It can trigger sneezing, congestion, coughing, and watery eyes, and it tends to bother people with asthma, allergies, or weakened immune systems more. Larger infestations and prolonged exposure raise the risk, so it is worth removing promptly and finding the moisture source rather than living with it.
Q: How do I clean mold off a shower ceiling?
A: Protect your eyes since you will be working overhead, then spray the ceiling with vinegar or peroxide and let it dwell. Use a flat mop or a sponge on an extension pole so you are not reaching with a ladder in a wet space. Mold on a bathroom ceiling often points to a ventilation problem, so improving the exhaust fan matters as much as the cleaning.
Q: How often should I clean my shower to prevent mold?
A: A light vinegar wipe down once a week keeps spores from establishing, and a 30 second squeegee of the walls and glass after each shower removes the standing water mold needs to grow. Those two habits prevent far more mold than any deep clean, and they take a fraction of the time.
Q: Can I just paint over or caulk over shower mold?
A: No. Covering mold traps the moisture and the colony underneath, and it will work its way back through the new surface within weeks. Mold has to be removed and the area dried before you reseal, repaint, or recaulk. Anything else is a temporary cover up.
Q: When should I call a professional for shower mold?
A: Call a professional when the mold covers more than about ten square feet, keeps returning after you clean it, appears alongside a known leak or water damage, or comes with a persistent musty smell that suggests hidden growth behind the wall. A remediation team can find the moisture source, contain the area, and confirm the mold is gone, which a surface clean cannot do.
The Final Verdict
Most shower mold is surface mold, and now you have the methods to clear it: vinegar for everyday cleaning, hydrogen peroxide for stains and grout, baking soda and borax for the stubborn jobs, and the dwell time discipline that makes all of them work. Just as important, you know the line where surface cleaning stops working, when mold has grown into caulk, grout, or the wall behind it, and what to do about it.
Clean the mold you can see, fix the moisture that grew it, and keep humidity under control with a fan and a squeegee. Do that and your shower stays clean. And when the mold keeps coming back or spreads beyond what a spray bottle can reach, The Mold Guys are here to find it, remove it, and make sure it stays gone. Call us any time at (941) 416-4113.