
Contents
- 1 Why Mold Grows Under Sinks
- 2 Identifying Mold Under Your Sink
- 3 What You Need Before You Start Cleaning
- 4 Step-by-Step: How to Get Rid of Mold Under the Sink
- 5 When to Call a Mold Remediation Company
- 6 What Professional Under-Sink Mold Remediation Involves
- 7 Preventing Mold Under the Sink From Returning
- 8 Final Thoughts
- 9 FAQs
- 9.1 Q: What causes mold to keep coming back under my sink?
- 9.2 Q: How do I know if the mold under my sink is black mold?
- 9.3 Q: Can I use bleach to clean mold under the sink?
- 9.4 Q: Is mold under the kitchen sink dangerous to my family?
- 9.5 Q: When should I call a professional instead of cleaning it myself?
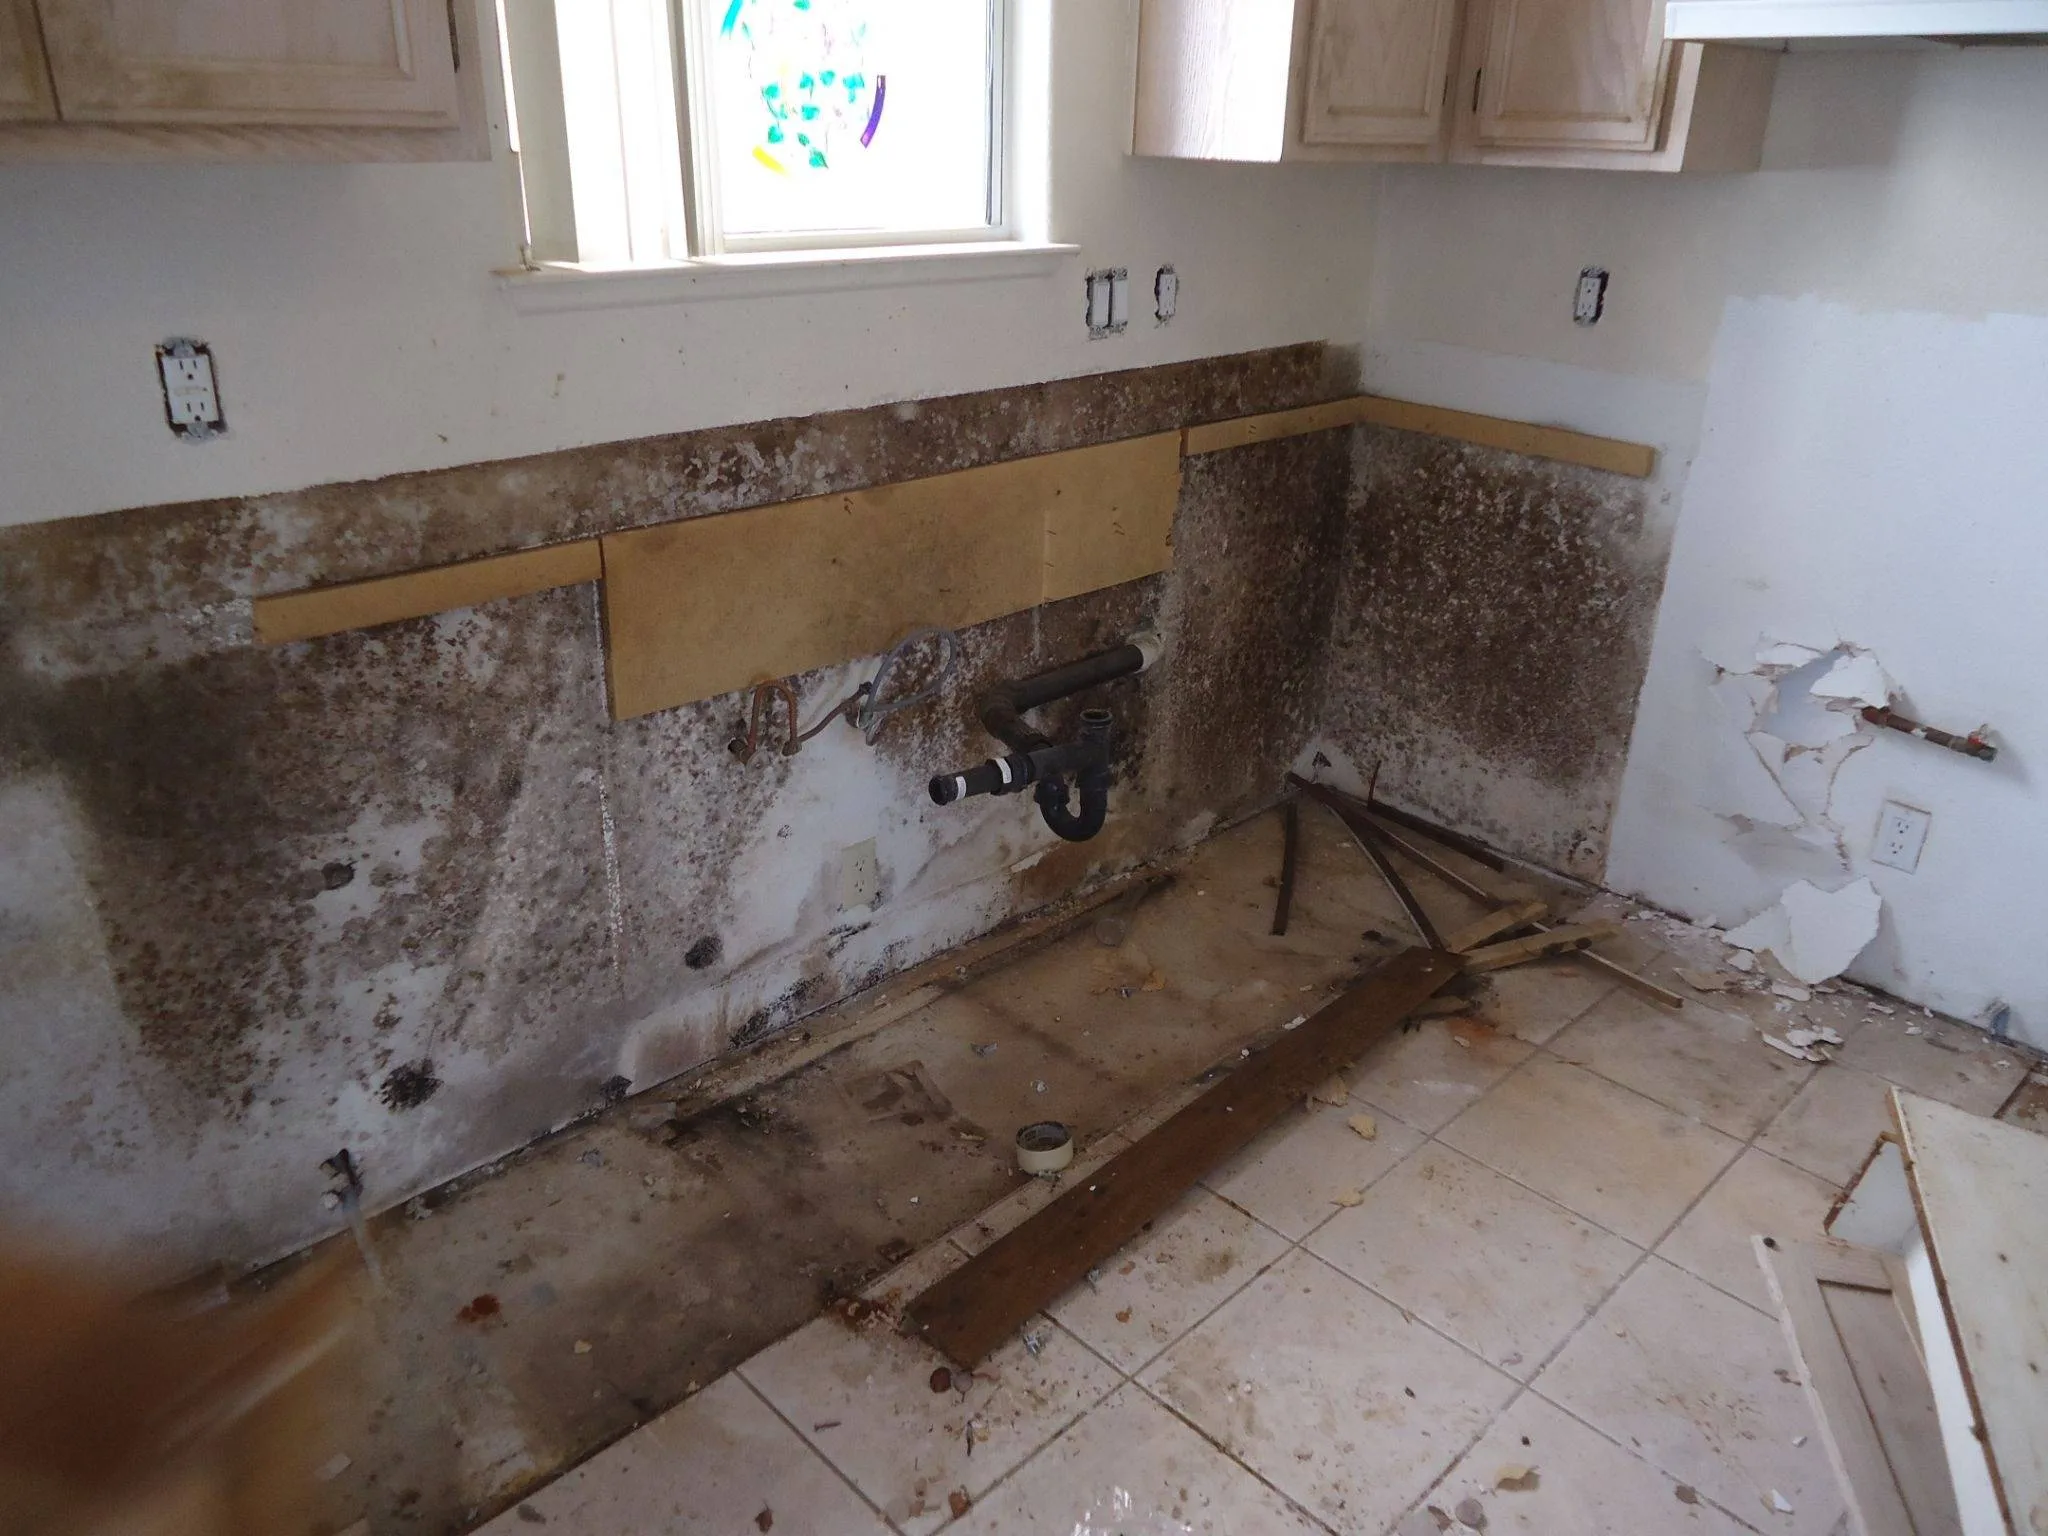
The cabinet under your kitchen or bathroom sink is one of the most common places mold grows in a home, and one of the least frequently inspected. It is a dark enclosed space that sits directly above plumbing connections, which means any slow drip, condensation buildup, or pipe seal failure introduces moisture into a poorly ventilated environment where it can persist for days or weeks without being noticed. By the time most homeowners discover mold under the sink, it has usually been growing for longer than they realize.
The fastest way to stop it is to fix the moisture source first, because cleaning mold from a cabinet that still has an active drip or condensation problem will result in the same growth returning within weeks. Once the moisture is resolved, the cleaning process for most under-sink mold situations is manageable with the right approach and protective gear. We will walk through the full process from identifying the problem to treating it and preventing its return, and cover clearly when the situation calls for a mold remediation company rather than a DIY approach.
Why Mold Grows Under Sinks
Understanding the specific conditions that create under-sink mold helps you address both the growth and the root cause effectively.
Plumbing Leaks and Drips
The most common cause of water damage mold under sinks is a slow plumbing leak that goes unnoticed. Supply line connections, drain pipe joints, the P-trap, and the shutoff valves beneath both kitchen and bathroom sinks are all potential drip points. A leak that produces only a few drops per hour creates enough cumulative moisture to support significant mold growth over days and weeks. Because the cabinet is closed most of the time, this moisture never evaporates and the organic wood or MDF of the cabinet floor absorbs it continuously.
Condensation on Cold Pipes
In warm humid climates like Florida, cold water supply pipes frequently develop condensation on their exterior surface when the surrounding air is warm and humid. This condensation drips from the pipe and collects on the cabinet floor beneath it without any actual plumbing failure. The moisture accumulates slowly but consistently, creating persistent dampness that supports mold growth even in the absence of a detectable leak.
Poor Ventilation Inside the Cabinet
Under-sink cabinets are sealed spaces with almost no airflow. Any moisture that enters from leaks, condensation, or simply the humidity of the surrounding room has nowhere to escape. The lack of air movement means surfaces stay damp for extended periods and mold can establish on the cabinet floor, back wall, and side panels without the drying effect that airflow would otherwise provide.
Previous Water Events Not Fully Dried
A single significant water event under the sink, such as a supply line failure or an overflowing drain, can saturate the cabinet materials deeply enough that standard drying never fully reaches the interior. Mold establishes in the residual moisture left in the cabinet floor and back panel and continues growing for months after the original event appears to have been resolved. If you have had under-sink water damage in the past, a current mold discovery may trace back to that event not having been dried completely. Our guide on how to fix water damage quickly covers the correct drying process that prevents this outcome.
Identifying Mold Under Your Sink
Knowing what to look for helps you identify the scope of the problem before you begin treatment.
Visual Signs of Mold
Open the cabinet and inspect all surfaces thoroughly with a flashlight. Look for:
- Dark green, black, or gray patches on the cabinet floor, back wall, or side panels
- White or fuzzy growth on wood or MDF surfaces
- Staining or discoloration that does not wipe away with a dry cloth
- Soft, spongy, or bubbling areas on the cabinet floor indicating moisture-saturated material beneath
Black Mold Under Sink
Black mold under sink situations are more common than in other areas of the home because the persistent moisture and organic wood material create favorable conditions for Stachybotrys chartarum specifically. Dark greenish-black patches that appear slightly slimy when moist and powdery when dried out may indicate this species. Black mold requires greater caution during cleaning because of its mycotoxin production and should be professionally tested if you are unsure of the species. Our guide on how to test for toxic black mold covers both DIY testing options and professional testing methods.
Odor Without Visible Growth
A musty smell coming from the cabinet even without visible mold patches often means mold is growing in less visible locations: the underside of the cabinet floor, behind the back panel, inside the wall cavity behind the cabinet, or on the subfloor beneath the cabinet itself. If you smell mold but cannot find it, do not assume the problem is minor. Hidden growth in these locations is often more extensive than surface growth that is visible during a standard inspection.
What You Need Before You Start Cleaning
Gather these supplies before opening the cabinet to begin treatment:
- N95 respirator mask
- Rubber gloves
- Safety goggles
- Stiff-bristle scrub brush
- Spray bottle
- White vinegar (undiluted)
- Hydrogen peroxide (3% solution)
- Baking soda
- Microfiber cloths
- Plastic bags for disposing of cleaning materials
- Fan or dehumidifier for drying after cleaning
Always wear all three pieces of protective equipment before touching any mold. Scrubbing releases spores at high concentrations in an enclosed space and the cabinet provides almost no dilution of that exposure without protection.
Step-by-Step: How to Get Rid of Mold Under the Sink
Step 1: Fix the Moisture Source First
Before cleaning anything, identify and resolve the moisture source. Inspect every plumbing connection inside the cabinet for drips. Run the tap and watch the drain connections, P-trap, and supply lines while water is flowing. Check shutoff valves for mineral buildup or seeping at the valve stem. Feel along cold supply pipes for condensation.
If you find a drip, fix it before proceeding with cleaning. Cleaning mold under an active leak is pointless because the moisture will support new growth within days of treatment. If the leak requires a plumber, schedule the repair first and complete mold treatment after it is confirmed resolved.
For condensation on cold pipes, wrapping the pipes in foam pipe insulation eliminates the condensation source by preventing warm humid air from contacting the cold pipe surface.
Step 2: Remove Everything From the Cabinet
Clear all stored items from beneath the sink. Inspect each item for mold. Cleaning products, sponges, and other items stored in a moldy cabinet often carry spores on their surfaces. Porous items showing visible mold should be discarded. Hard plastic or metal items can be wiped down with vinegar solution and allowed to dry fully before returning to a clean cabinet.
Step 3: Apply Vinegar to All Affected Surfaces
Spray undiluted white vinegar generously across all moldy surfaces and allow it to sit for 30 to 60 minutes. White vinegar’s acetic acid penetrates slightly below the surface of wood and MDF, which is important for cabinet materials that absorb moisture. Do not wipe it off during the contact time. The longer it sits the more effective the treatment. Our detailed guide on will vinegar kill mold explains exactly how this works and where its limitations apply.
Step 4: Scrub and Apply Baking Soda or Hydrogen Peroxide
After the vinegar contact time, scrub the affected surfaces firmly with a stiff brush. Follow the scrubbing with either a baking soda paste pressed into any remaining stained areas or a spray of hydrogen peroxide for a secondary treatment. Allow the hydrogen peroxide to sit for 10 minutes before wiping clean with a damp microfiber cloth.
For the back panel and side walls of the cabinet, work from the top of the affected area downward so that any dripping cleaning solution moves away from already-treated areas rather than recontaminating them.
Step 5: Dry the Cabinet Completely
After cleaning, dry all surfaces thoroughly with clean microfiber cloths and then set up a fan directed into the open cabinet to continue drying for several hours. Do not close the cabinet door until all surfaces are completely dry. Any residual moisture after treatment restarts the mold cycle quickly.
A small portable dehumidifier placed inside the open cabinet for several hours provides even more effective drying than a fan alone in humid conditions.
Step 6: Treat and Protect the Cabinet Floor
Once the cabinet floor is completely dry, inspect whether the material is structurally sound. Press firmly in several locations. If the cabinet floor feels soft, spongy, or has any give that was not present before, the moisture has compromised the material and it needs to be replaced rather than treated. MDF and particleboard cabinet floors that have been saturated become structurally compromised and continue harboring mold in the interior of the material even after surface treatment.
If the floor material is firm and undamaged, applying a thin coat of mold-inhibiting paint or sealer to the interior surfaces of the cabinet after drying provides an additional barrier against future moisture absorption.
When to Call a Mold Remediation Company
Most under-sink mold situations discovered early on hard cabinet surfaces are manageable with careful DIY treatment. However, several specific circumstances indicate that a professional mold remediation company is necessary rather than optional.
Situation | Why Professional Help Is Needed |
Mold has spread to the wall behind the cabinet | Requires opening the wall to assess and treat hidden growth |
Cabinet floor is soft, spongy, or structurally compromised | Material must be removed and replaced, not cleaned |
Mold returns within weeks of thorough cleaning | Hidden moisture source or deep material penetration not addressed |
Black mold under sink is confirmed or strongly suspected | Mycotoxin production requires professional containment and treatment |
Musty smell persists after complete cleaning | Growth exists in areas not accessible during standard cleaning |
Mold has spread to subflooring beneath the cabinet | Requires assessment and treatment beyond the cabinet interior |
Water damage mold extends to adjacent walls or flooring | Scope exceeds what under-sink cleaning can address |
If your situation matches any of these, attempting to continue with DIY treatment is likely to result in incomplete remediation and recurring growth. A professional mold inspection first identifies the full scope of the problem before remediation begins, which prevents the common outcome of treating what is visible while hidden growth continues spreading.
What Professional Under-Sink Mold Remediation Involves
When a professional mold remediation company treats under-sink mold, the process goes significantly beyond what is accessible during a standard DIY cleaning.
Moisture mapping using professional moisture meters identifies exactly which materials have elevated moisture content, including wall cavities, subfloor sections, and adjacent cabinetry that cannot be assessed visually.
Containment is established to prevent spores from traveling to other areas of the kitchen or bathroom during treatment, which is particularly important when wall cavities need to be opened.
Removal of compromised materials including cabinet floors, back panels, sections of drywall, or subfloor sections that have been saturated beyond what drying and surface treatment can resolve.
HEPA vacuuming of all accessible surfaces captures spores before physical treatment begins rather than disturbing them into the air.
Commercial antimicrobial treatment penetrates porous surfaces more effectively than household cleaning products and leaves residual protection against regrowth.
Post-remediation testing confirms that spore levels in the treated area have returned to normal before the space is considered clear.
For black mold under sink situations specifically, professional remediation is the safest approach because containment prevents mycotoxin-laden spores from contaminating the kitchen or bathroom during treatment. You can read more about why professional mold removal services provide outcomes that DIY approaches cannot match in situations involving significant penetration into building materials.
Preventing Mold Under the Sink From Returning
Once you have treated under-sink mold and confirmed the moisture source is resolved, these practices keep the problem from reoccurring.
Inspect the cabinet monthly. Open the cabinet and check the floor and back wall with a flashlight. A monthly inspection takes thirty seconds and allows you to catch any new moisture or early growth before it becomes extensive.
Leave the cabinet door slightly ajar periodically. Even once a day allowing air to circulate through the cabinet for an hour reduces the persistent humidity that builds up in a sealed space and slows mold establishment between inspections.
Place a moisture-absorbing packet inside. Small silica gel packets or a compact moisture absorber designed for enclosed spaces reduce ambient humidity inside the cabinet without requiring any ongoing action.
Replace supply lines on schedule. Braided stainless steel supply lines should be replaced every five to seven years proactively. Aging supply lines develop micro-failures before visible cracking occurs, creating slow drips that are easy to miss during routine checks.
Insulate cold water pipes. In Florida’s humid climate, pipe condensation is a consistent source of under-sink moisture. Foam pipe insulation applied to cold supply lines eliminates condensation completely at very low cost.
Address any new leaks within 24 hours. The same principle that applies to major water events applies to under-sink drips. A leak fixed the day it is discovered does not become a mold problem. A leak left for two weeks almost certainly does.
Final Thoughts
Knowing how to get rid of mold under the sink empowers you to handle most early-stage discoveries quickly and effectively. The process is straightforward when the mold is caught early, the moisture source is identifiable and fixable, and the cabinet materials are structurally sound. The keys are fixing the leak first, using the right cleaning agents with adequate contact time, drying completely, and inspecting regularly going forward.
When the situation involves black mold under sink, compromised cabinet materials, mold that has spread into wall cavities, or growth that keeps returning after cleaning, a professional mold remediation company is the appropriate next step. Surface treatment of a problem that has penetrated building materials does not resolve it. It delays it.
The team at The Mold Guys serves homeowners across Southwest and Central Florida with professional mold inspection, remediation, and water damage restoration services. With over 25 years of experience they can identify the full scope of any under-sink mold problem and resolve it completely. Contact The Mold Guys today for a professional assessment whenever the problem is beyond what surface cleaning can address.
FAQs
Q: What causes mold to keep coming back under my sink?
A: Recurring mold means the moisture source has not been fully resolved. Common causes include a slow drip at plumbing connections, condensation on cold supply pipes, or residual moisture in compromised cabinet floor material. Cleaning mold without fixing the moisture source produces only temporary results.
Q: How do I know if the mold under my sink is black mold?
A: Black mold appears as dark greenish-black patches that look slightly slimy when moist and powdery when dry. Appearance alone cannot confirm the species with certainty. Professional surface sampling and testing is the only reliable way to confirm Stachybotrys chartarum versus other dark-colored mold species.
Q: Can I use bleach to clean mold under the sink?
A: Bleach is not recommended on wood or MDF cabinet materials because it does not penetrate into porous surfaces and can raise moisture content in the wood. White vinegar followed by hydrogen peroxide is more effective for cabinet surfaces. Bleach works well only on nonporous hard surfaces like porcelain or sealed ceramic.
Q: Is mold under the kitchen sink dangerous to my family?
A: Yes. Active mold colonies release spores continuously into the air of the kitchen. In an enclosed cabinet those spores can reach elevated concentrations that are then released each time the door is opened. Prolonged exposure to elevated mold spore levels causes respiratory symptoms and other health effects over time.
Q: When should I call a professional instead of cleaning it myself?
A: Call a professional mold remediation company if the cabinet floor is soft or compromised, if mold has spread to the wall behind the cabinet, if a musty smell persists after thorough cleaning, if black mold is confirmed, or if mold returns within weeks of treatment despite fixing the moisture source.